Help Center
❯ AtData Services ❯ Email Validation
When you’ve purchased Email Verification, here is how you customize the results you receive.
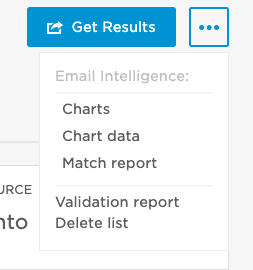
To obtain your Email Validation report, select the grey box to the right of the blue “Get Results” button. In the dropdown menu, you will see an option to access your Validation Report.
If you’ve purchased Email Verification, click the “Get Results” button on the List Overview screen to obtain your results. If you imported your email list from your email service provider (ESP), such as Mailchimp, you’ll first be given a choice of how you would like to export those results back to your ESP.
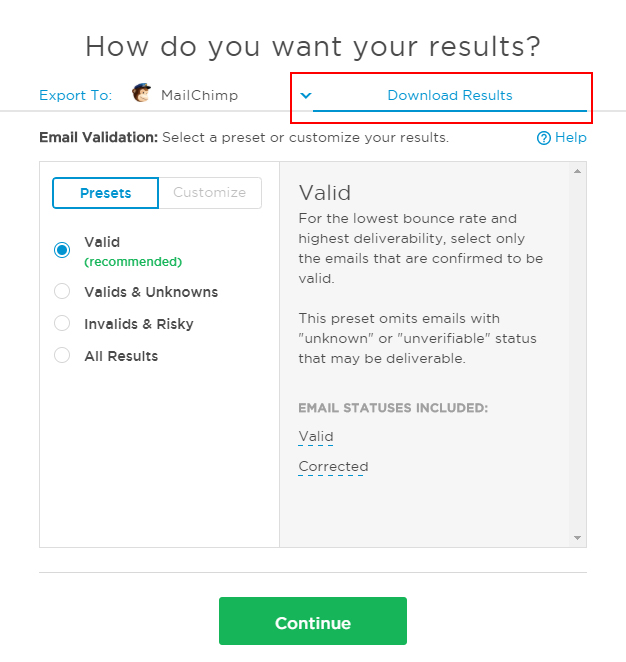
From there, you should see the following screen:
Email Verification Presets
InstantData has some presets available for common result combinations. These are available under the “Presets” sub-tab highlighted in blue on the left.
- Valids
This selection includes only the email addresses that passed AtData’s multi-step validation process. These emails are considered high-confidence valids, and are okay to mail.
- Valids & Unknowns
This selection includes valid, unknown and unverifiable emails. An unknown or unverifiable status indicates that the mailbox level validation check was not completed. Consider these emails partially verified. If you decide to mail to these records, expect that some will bounce.
- Invalids & Risky
This selection includes emails that are invalid or are likely to bounce when mailed to. AtData has identified these emails as invalid or risky.
- All Results
Prepared to handle the entire list? Choose “All Results” to receive your full list with comprehensive validation results included.
For a more in-depth explanation of our statuses and their specific codes, please reference Results Guide.
Custom Results
If you want a specific combination of results that are not addressed by the presents, select “Customize” to the right of the “Presets” tab on the screen.
Here you can select the Email Validation status values you wish to receive. Hover over each status value to get a description of that value, and toggle the slider to next to each value on or off. In the image above, the “Valid” and “Corrected” status values are in the on position to start, and “Unverifiable” is selected in addition.
Below, in “Other Criteria,” you can select specific domain types and whether to include role accounts in the results. You can also choose to include or exclude duplicate email addresses in your results.
What’s next
The button at the bottom of the screen will vary depending on what’s next. If you purchased other services in addition to validation, it will say “Continue”, and clicking that will take you to the options for your other services. Otherwise, the button will say “Download Results”, if you are downloading to your computer, or it will say “Export Results”, if you’re exporting the results to your email service provider.
Once you click download or export, you’ll be taken to a progress screen as we prepare your results for you. You can either wait for your results to be ready, or we will send you an email with a link to download them.
Check out our guide on how to use Email Verification results.
 Affiliate Marketing
 Automotive
 eCommerce and Retail
 FinTech
 LeadGen
 Nonprofit and Political
 Payments
 Technology Platforms
 Tourism and Hospitality